

6 Step Routine to Clean Patch Hats Without Damaging Leather
The safest way to clean a patch hat is to spot-clean the fabric with mild soap and cool water, wipe the patch instead of soaking it, and reshape the hat over a rounded form while it air-dries. Leather patches never touch soap or water directly. Fabric and embroidered patches tolerate a damp cloth but not a full soak. Skip these steps and you risk warping the brim or lifting the patch entirely.
TL;DR:
- Spot-clean fabric patches with a damp microfiber cloth or soft brush, avoiding soaking, to prevent warping or lifting the patch.
- Never soak leather patches or use harsh chemicals like bleach, and wipe them gently with a barely damp cloth followed by immediate drying.
- Reshape the hat over a rounded form while damp and air-dry away from heat or direct sunlight to maintain its original shape.
- Test colorfastness before cleaning, especially if the hat has bleeding or dye transfer risks, and avoid machine washing or dishwashers.
- Use performance or distressed materials with low-maintenance fabrics for easier care and longer-lasting appearance.
Table of Contents
- What You’ll Need Before You Clean a Patch Hat
- Step-by-Step: Cleaning A Hat With a Leather Or Fabric Patch
- Diagnosing Stains, Bleeding, and Warping
- What Not to Do When Cleaning a Patch Hat
- Storage Habits That Cut Down on Cleaning
- Warbeard Project’s Take on Caring for Patch Hats
- A Straight Take on Cleaning Patch Hats
- Warbeard Project Hats Built for Easy Care
- Sources
- FAQ
What You’ll Need Before You Clean a Patch Hat
Gather everything before you start. Switching methods halfway through a patch hat cleaning session is how mistakes happen.
- Mild detergent or gentle dish soap
- A soft-bristle toothbrush (a spare one works fine)
- Microfiber cloths, at least two
- Baking soda and white vinegar
- A small bowl for diluting soap
- A clean towel and a rounded drying form (a bowl, a ball, or a rolled towel)
Before touching the patch, run two quick checks. First, dampen a white cloth and press it against an inside seam to test colorfastness. If dye transfers, treat the whole hat gently and skip anything beyond light spot cleaning. Second, identify the brim (plastic snaps back into shape; cardboard stays permanently bent if it gets wet) and confirm whether the patch is leather, fabric, or embroidered thread, since each reacts differently to moisture.
Pro Tip: Snap a quick photo of the hat before you clean it. If the shape-shifts during drying, you’ll have a reference for reshaping it back to original form.
Step-by-Step: Cleaning A Hat With a Leather Or Fabric Patch
Work through this in order. Skipping ahead to the sweatband or the patch before prepping the hat is the most common way people end up with a bigger stain than they started with.
- Prep the hat. Brush off loose dirt with a lint roller or soft brush. Check the care label if there is one, inspect the patch material, and run the colorfastness test described above.
- Spot-clean the fabric. Dilute a small amount of mild soap in cool water. Dip a soft toothbrush or microfiber cloth and work in small circles over stained areas. Hand-washing in cool water with mild detergent is the safest approach for most hats, according to cleaning guidance from The Output by Peloton. Avoid saturating structured front panels or foam inserts.
- Treat the sweatband. Pre-treat with a baking soda paste or a bit of mild detergent worked in with the toothbrush. For rings that won’t budge, an oxygen-based cleaner dissolved in cool water can lift stubborn buildup on colorfast, machine-washable fabric, per OxiClean. Diluted white vinegar works as an alternative. Spot-test either option first.
- Clean the patch. Wipe a leather patch with a barely damp cloth, nothing more. No soap, no soaking. Dry it immediately with a separate cloth. If the leather looks dry or dull, a small amount of leather conditioner rubbed in after a spot test can restore it. Fabric and embroidered patches can handle the same gentle circular motion as the rest of the cap, just with less pressure.
- Rinse and blot. Rinse treated fabric areas with cool water, then press, don’t wring, between two towels to pull out excess moisture.
- Reshape and dry. Immediately place the damp hat over a rounded form, a bowl, a ball, or a rolled towel, and let it air-dry away from direct sunlight or heat vents, following practical drying and reshaping tips to preserve hat shape as explained in how to unshrink a hoodie and get your fit back.
Hat restorers consistently point to one principle across this entire process: start with the lightest treatment first. Spot-cleaning solves the majority of stains on its own, and reshaping while the hat is still damp is what keeps the crown from drying into a warped shape.
Some hats are worth handing off. Vintage caps, structured styles with cardboard brims, or anything with heavy sentimental or resale value are better left to someone who works on hats professionally, since many general dry cleaners aren’t set up for structured hat repair and can make vintage materials worse.
Diagnosing Stains, Bleeding, and Warping
Not every mark on a hat needs the same fix. Matching the treatment to the problem keeps you from over-cleaning fabric that only needed a quick wipe.
- Fresh sweat stains: spot-clean right away with mild soap; they lift easily before they set.
- Set-in sweat rings: need a baking soda paste or a longer oxygen-based soak, and even then, some stains left untreated for years may never fully disappear.
- Oily or makeup stains: treat with a diluted dish soap solution or a solvent suited to the fabric, always spot-tested first.
- Color bleeding: stop immediately, blot the area, re-run the colorfastness test, and bring in a professional if the dye keeps transferring.
- Warped brim or crown: reshape while the hat is still damp over a rounded form. Heat, including a hair dryer, sets a warp permanently instead of fixing it.
Pro Tip: If a stain has been there for more than a year, treat your expectations, not just the fabric. A lighter shadow after cleaning is often the realistic best outcome.
What Not to Do When Cleaning a Patch Hat
A handful of shortcuts show up constantly in online advice, and they’re the fastest way to ruin a hat with a patch.
- Never machine-wash or tumble-dry a structured hat. The agitation and heat warp brims and crowns in ways that don’t reverse.
- Skip the dishwasher entirely. Dish detergents often contain bleach, and the heated dry cycle sets stains rather than lifting them.
- Don’t soak a leather patch, and never use bleach or harsh chemicals near it.
- Never wring or twist a wet hat, and don’t speed up drying with direct heat.
Dishwasher hacks for hats circulate widely online, but the risk of warping the brim or damaging the patch far outweighs the time saved. Hand-cleaning takes a little longer and handles nearly every stain a dishwasher claims to fix.
Storage Habits That Cut Down on Cleaning
The best cleaning routine is the one you rarely need. A few habits stretch the time between full cleans significantly.
- Let hats air out fully between wears instead of tossing a sweaty cap straight into a drawer.
- Rotate two or three hats in regular use rather than relying on one every day.
- Removable sweatband liners catch oil and sweat before they reach the fabric.
- Store hats on a rack, hook, or hat form, away from direct sunlight and humidity, which both degrade dyes and adhesives over time.
- Waxed canvas, wool, and vintage materials need less water overall. Brushing off dry dirt and spot-wiping with a damp cloth protects the coating instead of stripping it with soap.
Cleaning experts who work with performance and outdoor caps recommend rotating hats and using liners specifically to prevent the sweatband buildup that forces a full clean in the first place.
Warbeard Project’s Take on Caring for Patch Hats
Ian, Warbeard Project
Warbeard Project builds hats meant to hold up through daily wear, which means the patches and stitching are made to survive real use, not just a shelf. That durability only holds if the cleaning method respects the materials.
- Warbeard Project sells patch and embroidered hats built for regular wear, and the same protect-the-patch approach applies across the lineup, including partnership pieces covered in the veteran nonprofit apparel guide.
- Commemorative or older caps deserve the gentler end of this workflow, similar to the care notes covered for collectible apparel in general.
A Straight Take on Cleaning Patch Hats
Most advice online treats hat cleaning like laundry, and that’s the root of most patch damage. A patch hat isn’t a t-shirt with a logo on it. It’s a structured object with a delicate attachment point, and every step in this process exists to protect that attachment point first and the fabric second.
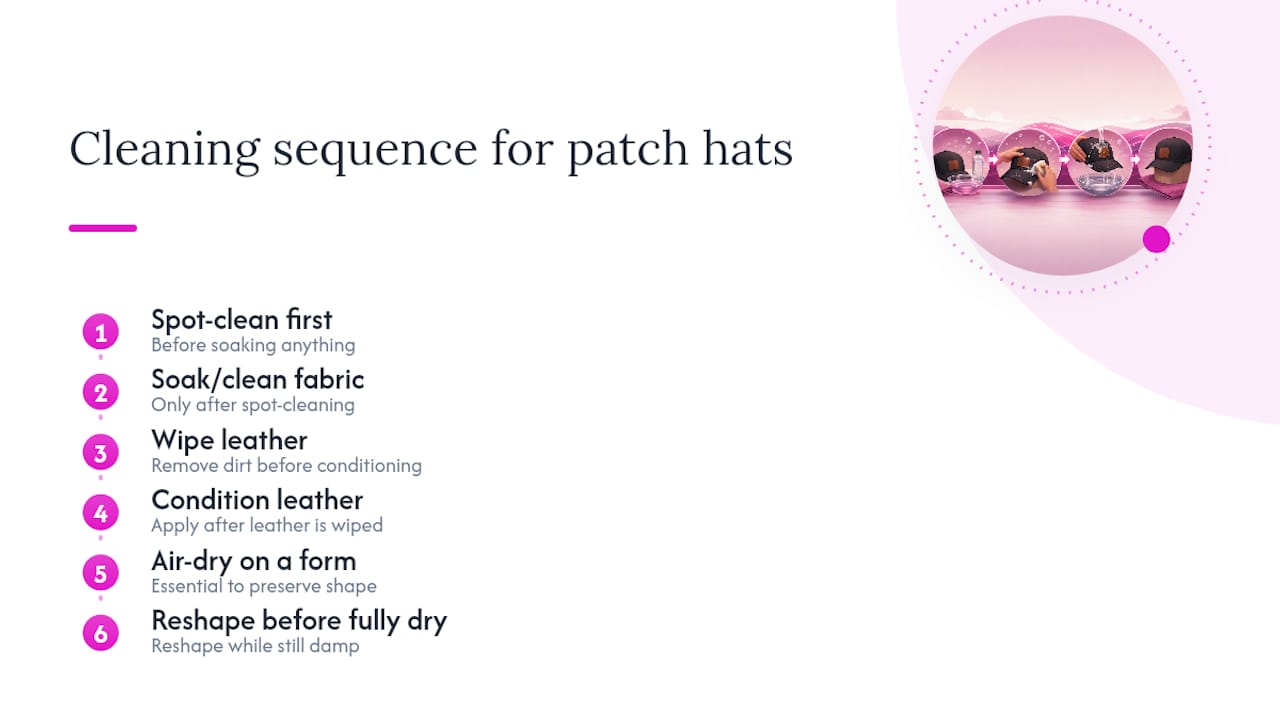
The conventional wisdom that “a quick wash won’t hurt” ignores how leather reacts to water: it stiffens, cracks, or discolors in ways that don’t reverse. The fabric-first crowd also underrates air-drying on a form, treating it as optional when it’s actually doing half the work of preserving the shape.
If you take one thing from this, it’s sequencing. Spot-clean before you soak anything. Wipe leather before you consider conditioning it. Reshape before the hat fully dries, not after. Skip the sequence, and you’re not saving time, you’re gambling with a patch that can’t be replaced.
— Ian
Warbeard Project Hats Built for Easy Care
Some patch hats are made consistent with the care recommendations in this guide, using materials chosen so a light cleaning routine generally works instead of requiring constant restoration.
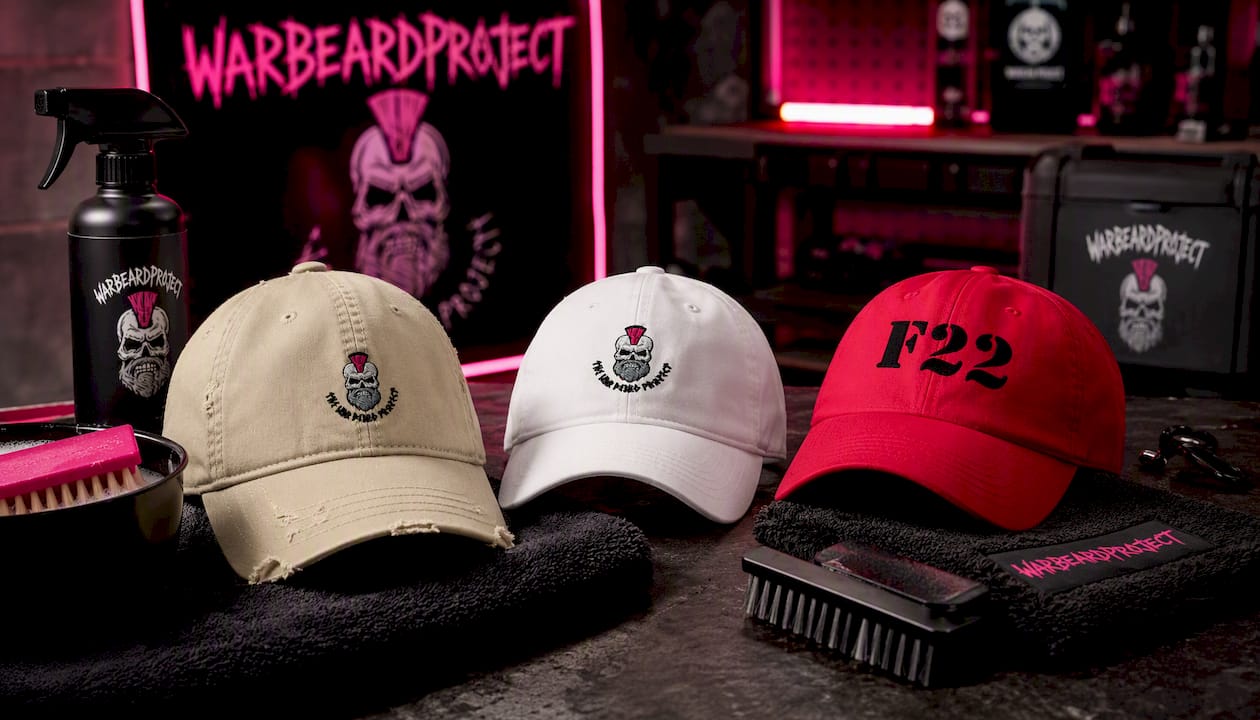
The OG Logo Distressed Dad Hat uses a distressed cotton build that responds well to simple spot-cleaning with mild soap and a soft brush, no soaking required. The Under Armour® OG Logo Dad Hat is built from moisture-wicking performance fabric, so a quick sweatband treatment with a baking soda paste handles most of what it picks up during wear. The Under Armour® F22 Dad Hat shares that same performance construction and holds up to the same cool-water spot-clean routine without losing shape.
Browse the full hat and apparel collection to find a patch hat that’s easy to keep looking sharp for years.
Sources
- How to Wash Your Hat (Without Ruining It) | GQ
- How to Get Sweat Stains Out of Hats: Step-by-Step Tips | The Output by Peloton
- How to Wash a Snapback, Trucker, Dad Hat or Beanie | Oxiclean™
- How to Clean a Trucker Hat (Without Ruining It) – Sackett Ranch
FAQ
How do you clean a hat with a leather patch?
Wipe the leather patch with a barely damp cloth only, never soap or water directly, and dry it right away. Clean the surrounding fabric separately with mild soap and a soft brush, keeping moisture away from the patch itself.
How can I clean my hats without ruining them?
Spot-clean instead of soaking, test colorfastness on an inside seam first, and always reshape the hat over a rounded form while it’s still damp. Machine washing and dishwashers are the two fastest ways to warp a structured brim.
What is the best hat patch for easy cleaning?
Fabric and embroidered patches generally tolerate cleaning better than leather, since they can handle a damp cloth without cracking or discoloring. Warbeard Project’s performance-fabric styles, like the Under Armour® OG Logo Dad Hat, are built for this kind of low-maintenance care.
Can I use Dawn dish soap to clean my hats?
A small amount of diluted mild dish soap works fine for spot-cleaning fabric, but it should never touch a leather patch directly. Always test on an inconspicuous area first, since some dish soaps are stronger than standard laundry detergent.